A few questions on my PRV

A place to showcase your pride and joy

Moderators: eastlmark, BIG_MVS, Test Moderator

no avatar
User

dallarax19

Rank

Non Member

Posts

99

Joined

Tue Oct 30, 2012 1:44 am


Has thanked: 0 time
Been thanked: 1 time

A few questions on my PRV

Postby dallarax19 » Fri Jul 05, 2013 12:48 pm

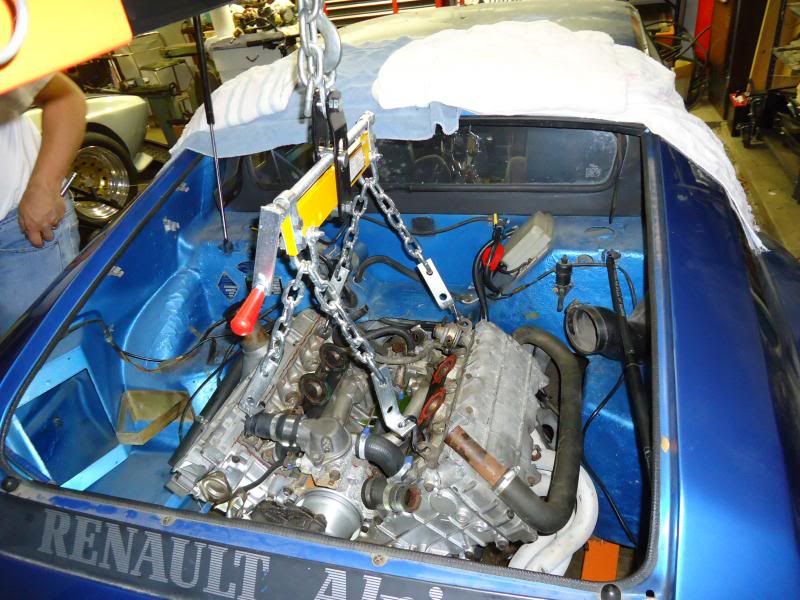
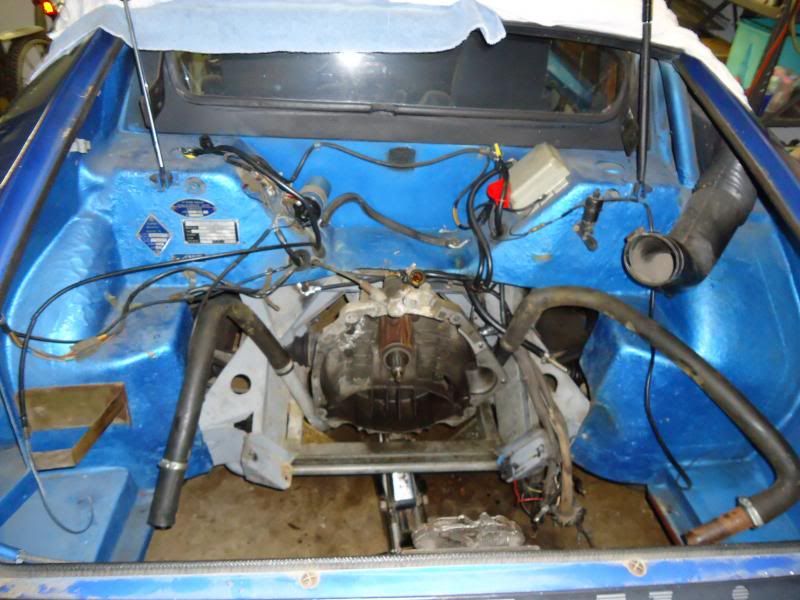
I finally got the engine removed and found some things that didn't make much sense to me so I would appreciate some help.

Image

Image


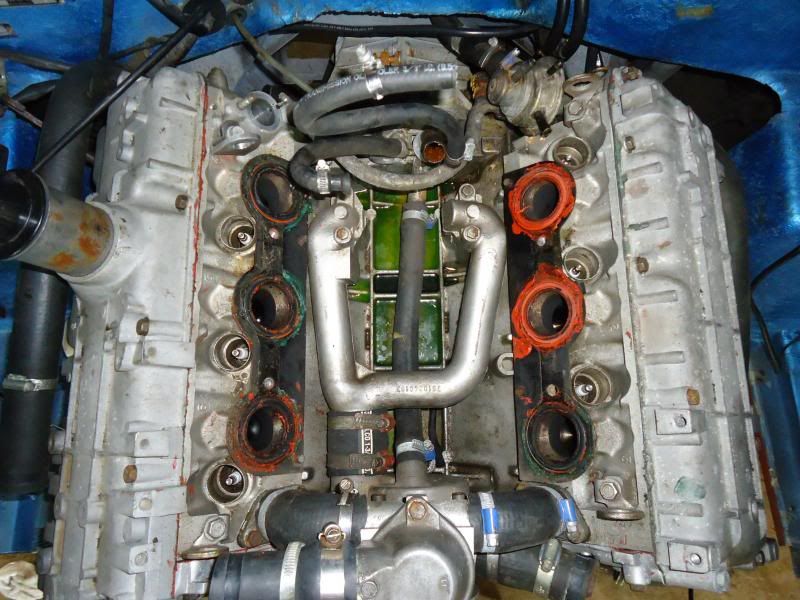
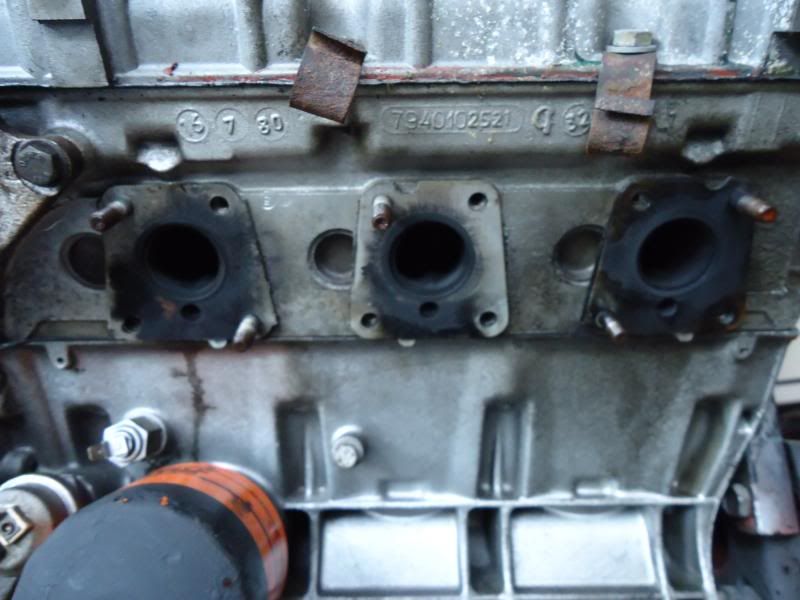
Is it common to use so much silicone on the intake? If so why?
Image


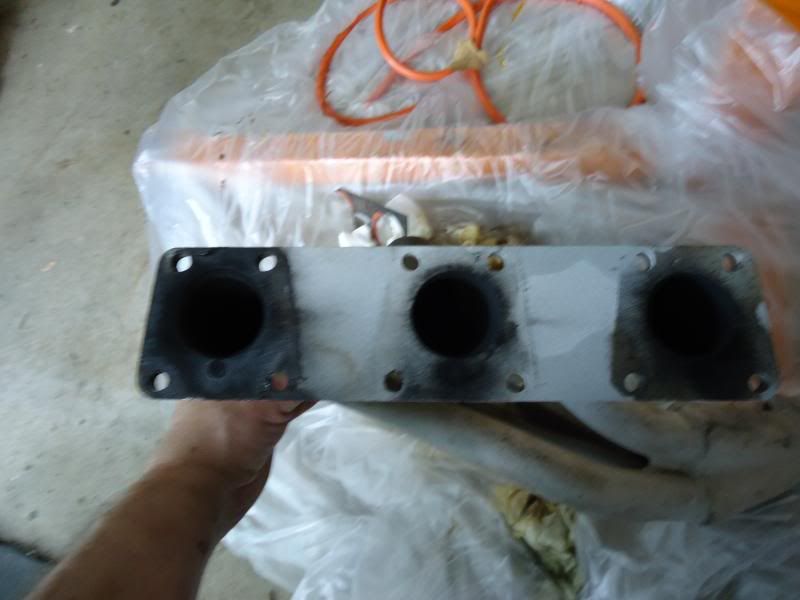
Is it common to have exhaust leaks at the gasket interface? I have seen another car that had only two fasteners per port as well and thought it was questionable. For the short time I drove the car it did not appear to have any problem sucking air in from the exhaust ports and popping.
Image
Image

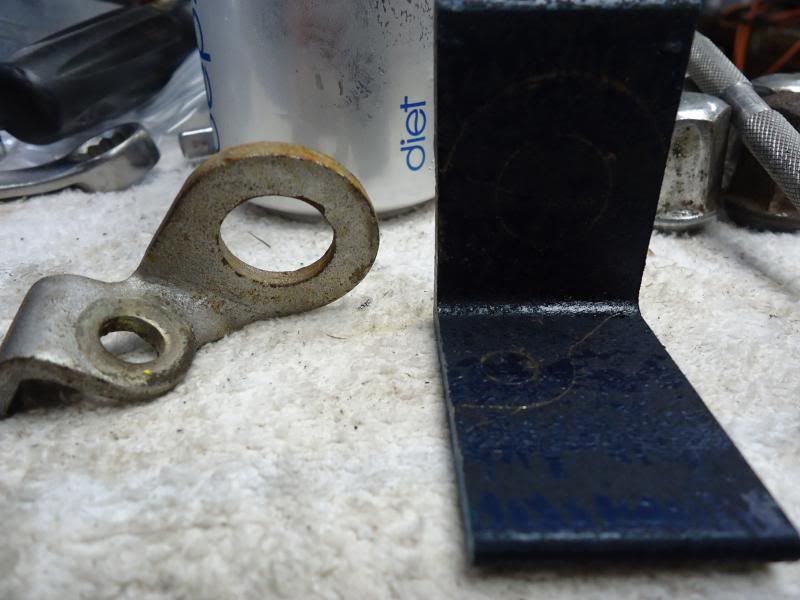
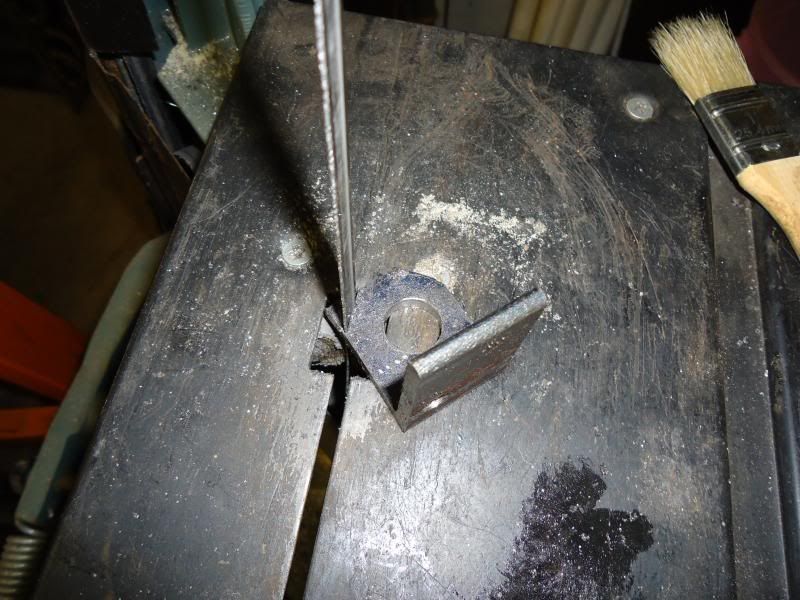
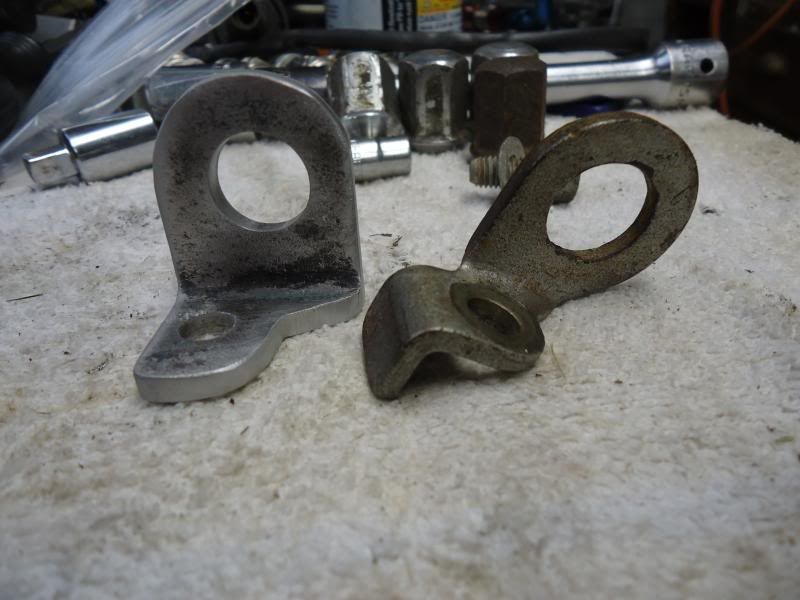
A few minor issues but otherwise going to plan. I had to fab up a lug for the distributor location.
Image
Image
Image


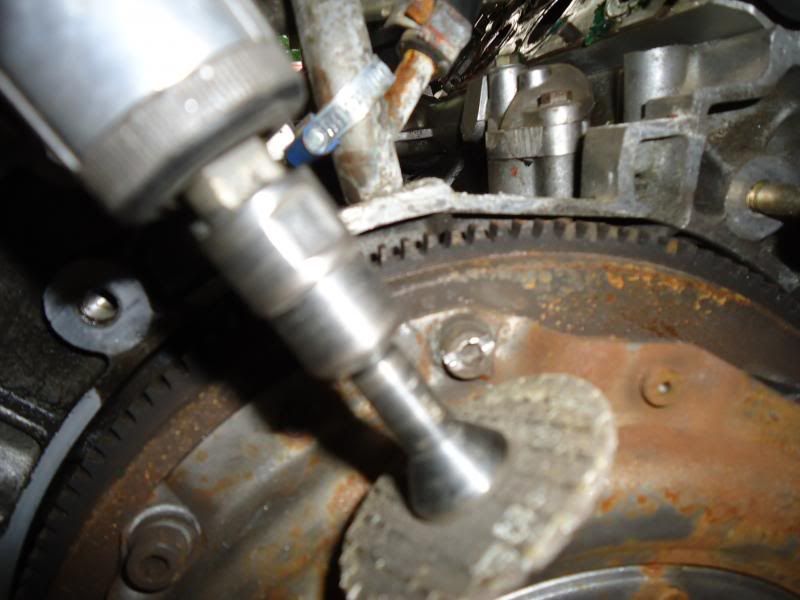
One broken bolt in the water manifold and one stripped internal hex in the pressure plate fastener otherwise went OK. Only frustration really was removing the lower flywheel shield due to the limited access to the bolts.
Image


One final question, what is the best way to get the trans out? I mean physically after the mounts, shift linkage, and CVs are disconnected?
Image
User avatar
User

johnb

Rank

Non Member

Posts

858

Joined

Wed Sep 13, 2006 6:57 pm

Location

Cheshire


Has thanked: 13 times
Been thanked: 25 times

Postby johnb » Fri Jul 05, 2013 5:54 pm

As my engine hasn't run yet in my ownership I don't have any experience of intake or exhaust manifold leakage. Here's some of my findings.

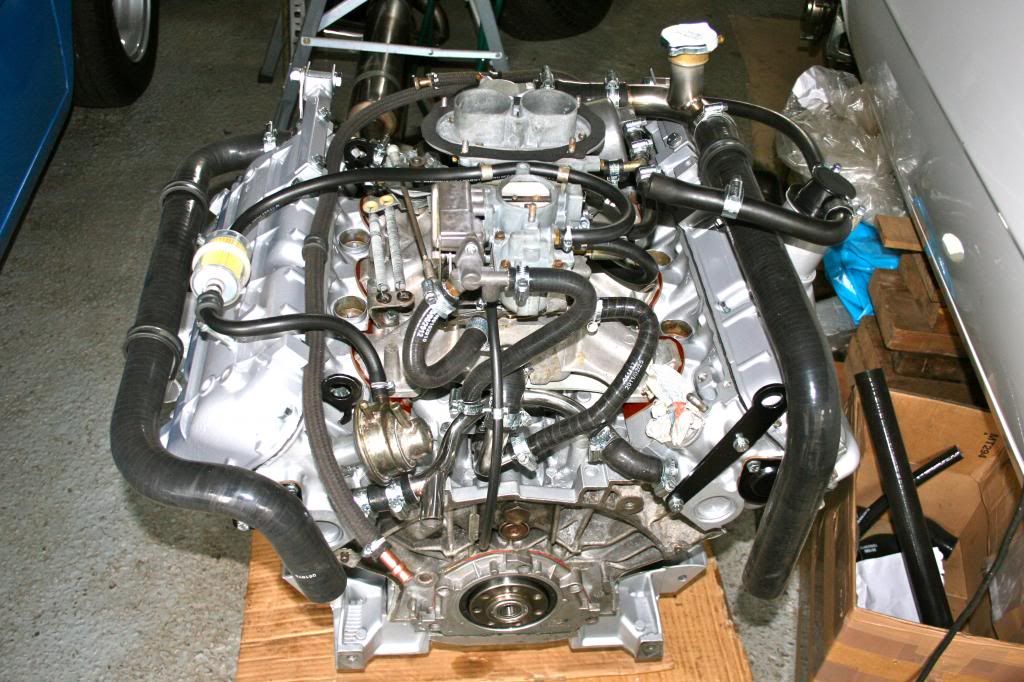
The intake manifold large 'O' rings are in place on your photo but maybe they've flattened or the previous owner had a 'belt & braces' approach to sealing. I bought new 'O' rings from Simon Auto and they do stand proud of the face of the insulating plates so I presume they'll seal as they are compressed by tightening the manifold.

Half of the exhaust manifold studs were missing or sheared on my car so I removed them all, some with difficulty and had to re-tap two of the holes. I bought new studs from the DeLorean club at:-

http://www.deloreanclub.co.uk/parts/engine.htm

A neat bit of fabrication for the missing lifting bracket. Just for interest, the original ones look like this, on the back of the head. Presumably so you can leave the distributor in place when removing the engine. Yours is just as good as removing the distributor isn't a problem.

Image

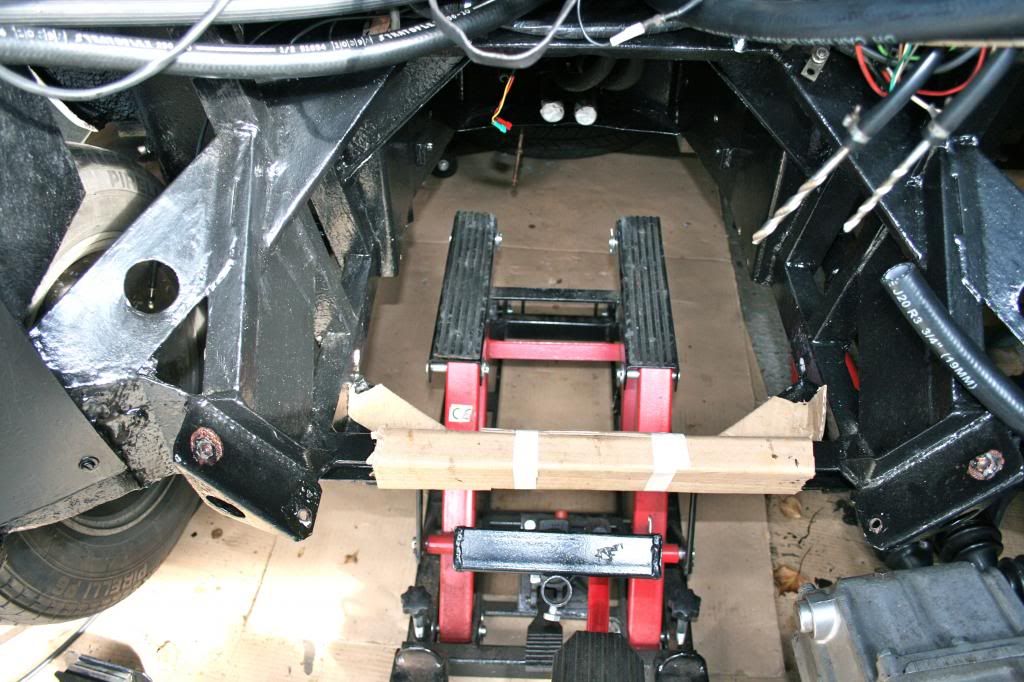
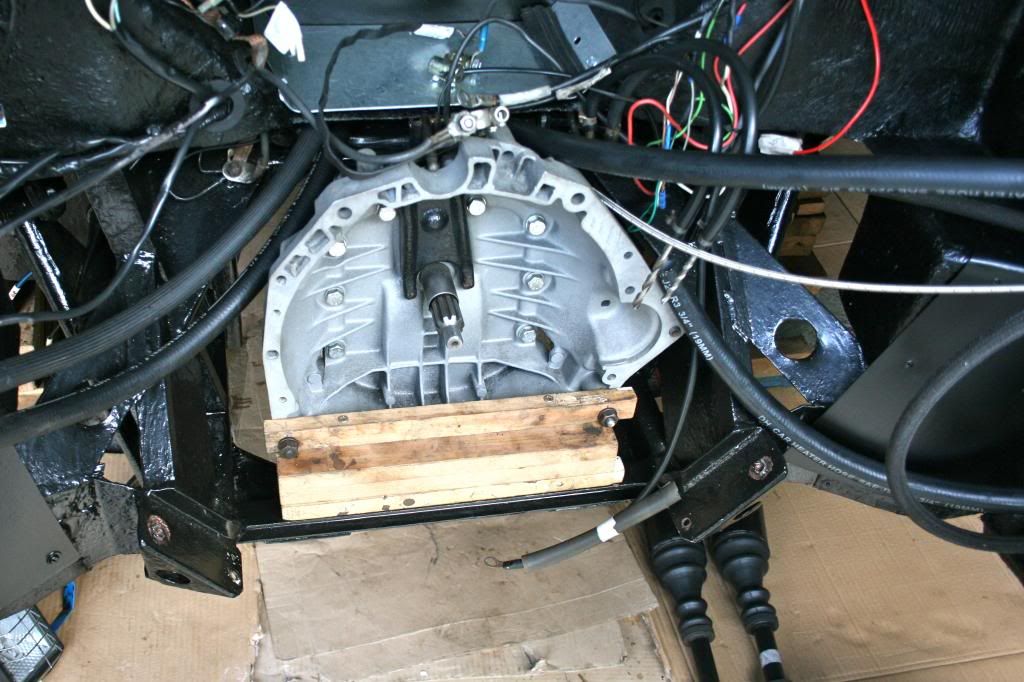
For removing the gearbox, and engine, I bought a motorcycle lifter. I supported the gearbox on the lifter whilst removing the supports. Then lowered, tilting it backwards and it came out downwards. Obviously remove the detachable cross member that's under the box first.

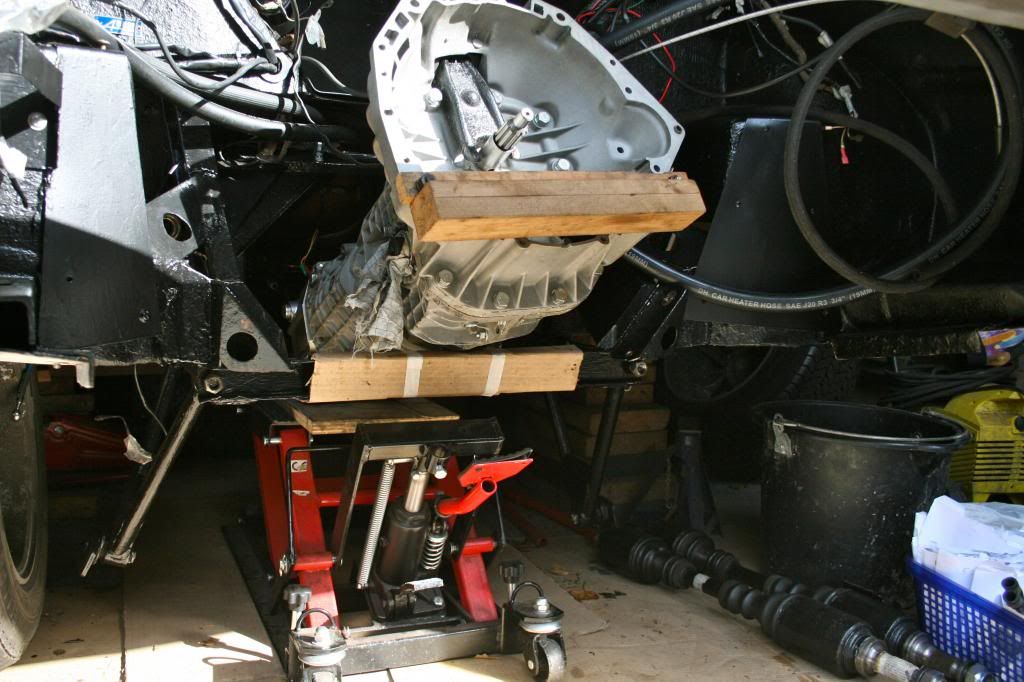
When I put it back i realised that it would go back in from the engine compartment by lifting it over the fixed cross member and supporting it on the lifter. This is shown in the photos below. The pieces of wood bolted to the bell housing allow the box to rest on the fixed cross member after installation and saves having to have a jack under the bell housing all the time the engine is out. I cut and screwed the wood pieces together before I removed the gearbox.

Lifter in position:-

Image

After lifting over the cross member:-

Image

Finally in place:-

Image
no avatar
User

dallarax19

Rank

Non Member

Posts

99

Joined

Tue Oct 30, 2012 1:44 am


Has thanked: 0 time
Been thanked: 1 time

That looks great! Have many questions

Postby dallarax19 » Sun Jul 07, 2013 1:31 pm

Thanks for the photos, that is what I am going for, some questions
First, should this question really by under Martin's PRV boneyard or is it best as a stand alone?

For John:
1) What did you paint the castings with?
2) Did you get the pump replated or is it a new one?
3) Did you place the coolant pipes with stainless or are the originals replated?

Some general questions to the masses on the rebuild:
1) Do you check the running clearance in the bearings (main and conrods) and if so what is the proper clearance
2) What are the "gotchas" in rebuilding the engine, what details are frequently missed?
3) Has anyone put in a set of dbilas cams and if so are there any issues or special provisions I would need to make, also any preference of which one for a street car?

Thanks again for the input.
User avatar
User

johnb

Rank

Non Member

Posts

858

Joined

Wed Sep 13, 2006 6:57 pm

Location

Cheshire


Has thanked: 13 times
Been thanked: 25 times

Postby johnb » Mon Jul 08, 2013 3:03 pm

1. Casting painting:-

Gearbox - I had the box overhauled by a gearbox specialist and he had the casings vapour blasted once stripped, as far as I know. He suggested that I protect the exterior from oxidation so I gave the whole box a coating with clear lacquer. It's been on for over a year now and still looks good. Bear in mind that the car is not yet mobile and has been garaged.

Rocker and timing chain covers - I had these powder coated.

Engine block and lower block - I cleaned off all the oxidation with various sizes of rotary wire brushes in an electric drill. I then washed them and once dry applied a first coat of etch primer, then a coat of aluminium paint followed by a final coat of clear lacquer. As the engine hasn't been run yet I've no way of knowing whether the finish will stand up to temperature, etc.

Sump - The casting was in good condition without any oxydation. So I just cleaned it and gave it a coat of clear lacquer.

2. The fuel pump is as it was when I bought the car and the plating is quite good. It probably looks more shiny in the photo due to the camera flash.

3. I had all the coolant pipes copied by a stainless steel exhaust fabricator due to the corrosion of the original pipes. See this link.

http://www.renaultalpineownersclub.com/ ... lant+pipes

General questions:-

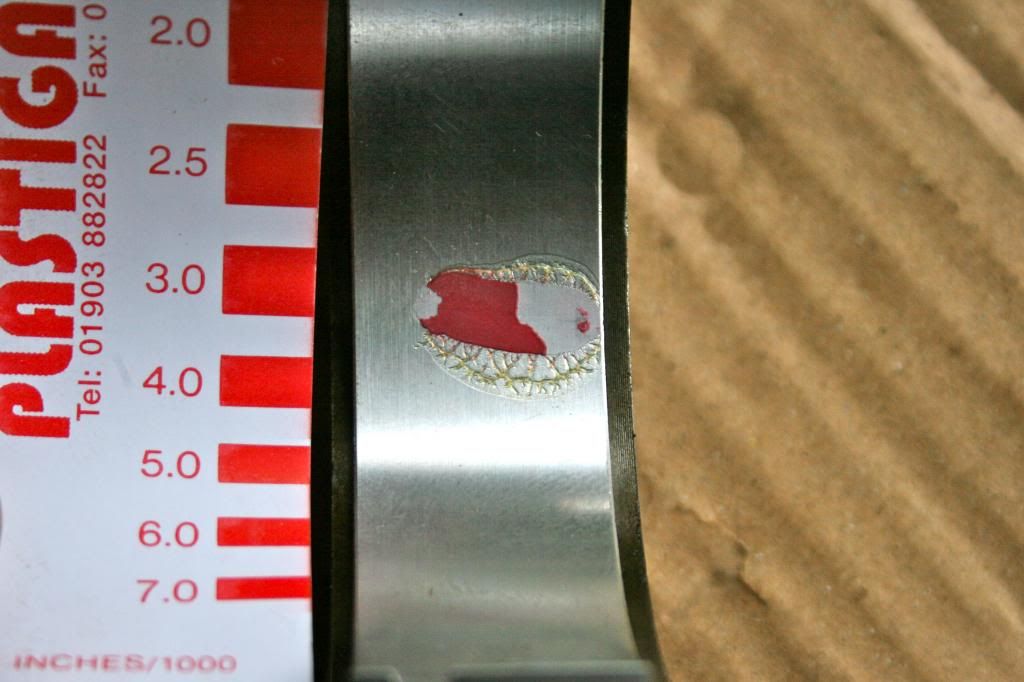
1. Running clearances - I did check the clearances purely to know what they were rather than it being an unknown. I fitted new main and big end bearings and used Plastigauge to check the clearances. This is one of the big end bearings.
Image

I have three reference books which give slightly different clearance values but these below should be representative. Note that my engine has the odd-fire crank with standard main bearings (2.7576" - 2.7583") and standard crank pins (2.0578" - 2.0585").
Main bearing clearance - 0.0014" - 0.0034".
Big end bearing clearance - 0.0011" - 0.0031"
Crankshaft end float - 0.0027" - 0.0106"

2. Rebuild gotchas - I'm an amateur, but have built a few engines over the years.
- Take plenty of notes as you dismantle, measure and record.
- Take plenty of photos.
- Get hold of an engine manual which will tell you all the things to look out for. I bought a couple of manuals from an autojumbler at a classic car show some time ago for £2.00. They are:-
- Haynes Volvo 260 series 1975 - 1985 workshop manual (ISBN 1 85010 206 6).
- Autobooks Volvo 260 series 1975 - 1978 workshop manual (ISBN 0 85147 719 4).
I'd recommend both, especially the Haynes manual. You might find them on Ebay.

3. I don't have any experience of dbilas cams. Some of the other guys might have.

  • Advertisement

Who is online

Users browsing this forum: No registered users and 51 guests

Powered by phpBB ® | Renault' and 'Alpine' are trademarks of Renault S.A.S. or its subsidiaries and are used with kind permission of Renault France